Pages

Blog post updated : no update

Tuesday, July 31, 2007

GSpot - Codec information appliance

What? GSpot? Take it easy man. This post is nothing to do with this one. GSpot was one of my favorite software. It is the top recommended software from me. It identifies which video codec and audio compression method is used on your media files, whether the matching codec is installed or not.

Ok, let me tell you my true story. Yesterday, I have just downloaded one movie with .rar files and extracted it. It's a .Xvid file. You know what it is, right? To play that file you need Xvid codec. I have installed it and play the file with Windows Media Player Classic but failed to render. I try to googling somewhere and try to install another codecs. Another useless effort.

Finally, I opened the GSpot software and then open that stubborn .Xvid file. And guess what. It's a Winrar file. I try to rename the file with .rar extension and extract it. Its successfully extracted the .avi file. That file running smoothly using Windows Media Player.

You will never expect that the .Xvid file was the Winrar file. Take a look at this image:-
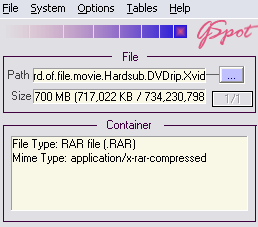
This is how GSpot shows the file information.

How to use this software?

First, download this software right here. Install it and wait a few seconds (loading the codecs). And then, open the media file that cannot be open on your PC. View the file information and the codec needed. Googling, download, install and that's all.

You can read more about GSpot review on Softpedia. Yeahhh!!!

Saturday, July 28, 2007

Illustrator tutorial - Create customize shape using Pathfinder Tool

Ok guys, this is the simple tutorial ever. Hehe..The Pathfinder Tool in the Adobe Illustrator is very useful when you want to customize your shape rather than the normal shape such as rectangle, rounded rectangle and so on.

In this tutorial, we will learn on how to draw the folder icon image.

Software: Adobe Illustrator CS

Step 1

Open your Illustrator and create new document with 500px x 500px Artboard setup. Make sure you select RGB color for color mode.


Step 2

Make your fill color look like this first (Green: #006600 or 0,127,15). Select the Rounded Rectangle Tool and draw two shapes and place them together like below.
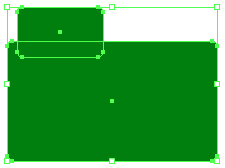


Draw the big one:- Click once at the artboard (you’ll see a popup) and set Width:210px, Height: 120px, Corner Radius: 5px.

Draw the small one:- Same like drawing the big one but set Width:86px, Height: 50px, Corner Radius: 5px.


Step 3

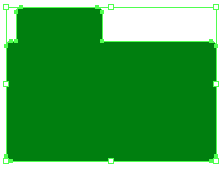
Select both shapes and go to Pathfinder Tool (Shift + F9). Click to the Click to shape area and then click Expand . You will get something like below:-
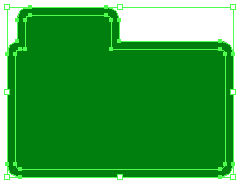


Step 4

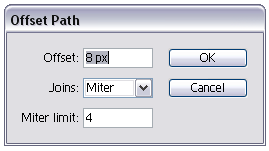
Ok, select our new shape, go to Object > Path > Offset Path…Set Offset: 8px, Joins: Miter, Miter limit:4


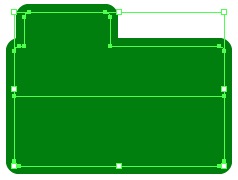
You’ll get something like this:-


Step 5

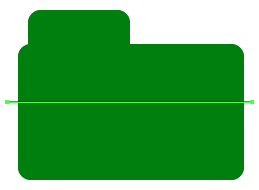
Select the Line Segment Tool (\) and draw a line like below:-


Step 6

Select the original shape and the line by pressing the Shift key. Go to the Pathfinder Tool once again and click the Divide tool .


Step 7

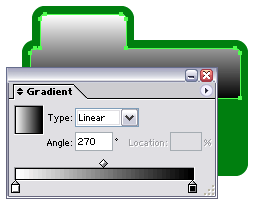
Click the Direct Selection Tool (A) and select the top part of the divided shape. Now, apply the White, Black gradient on it.
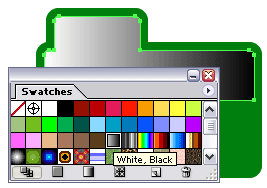


Note: Go to menu bar Window > Swatches if your Swatches palette not appear.

Then, go to Gradient palette (Window > Gradient of press F9) and set the Angle: 270 and press ENTER. See below:-


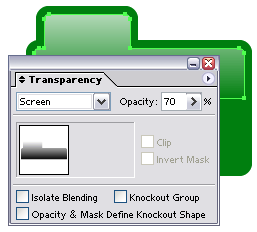
And after that, go to Transparency palette (Window > Transparency or press Shift + F9) and set to Screen and Opacity: 70.


Step 8

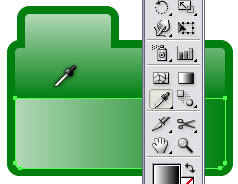
Ok, now, using the Direct Selection Tool (A), select the bottom part of the divided shape. Click the Eye Dropper Tool (I) and click on the top part of the shape (the one that we have applied the gradient). We would like to apply the same gradient effect on it.


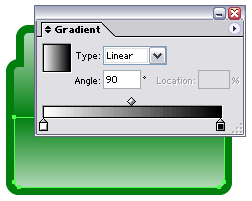
Then, set the Gradient Angle: 90 and press ENTER.


Step 9

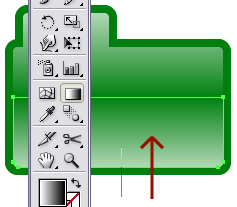
Ok, almost finish. While the bottom part of the shape was still on selected, click the Gradient Tool or press G. Then, while pressing the Shift key, click at the bottom of the shape and drag it to the top a little bit.


You’ll get something like below after releasing your left click:-


Step 10

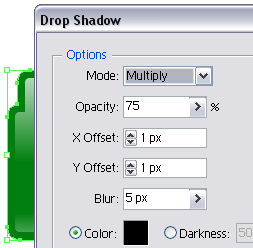
Final step. Click on Selection Tool or press V and select the offset path (the green one). Go to Effect > Stylize > Drop Shadow... Set X Offset:1px, Y Offset:1px, leave everything as default and press OK. DONE.


Our final result:-


And of course, you can change the green color to any color you like or play around with the Opacity value on the Transparency palette.

Some other shapes I created using the similar technique.


That's all for today and have fun.

Yeahhh!!!

Friday, July 27, 2007

Google search tips and tricks (links)

Hmm...Actually, I just want to share a links that will provide you a great tips and tricks to use Google more efficiently. I used Google everyday and I really hope this links will be useful for you guys.

Ok, check out this sites:-

1. Firefox & Google - Powerful search utility

2. Google file search

3. Google advanced operators

4. 7 clever Google tricks

5. Google search tips


How about it? Do you have any tips or tricks to share? Or just a links? Feel free to drop a comments. Hehe..

Thursday, July 26, 2007

Windows XP - Remove Recycle Bin icon from Desktop

Ok, a quick tips for today. There are some icon on your Desktop that cannot be removed and maybe you would like to remove them. For example Recycle Bin. This is how it's done.

First thing first, run your Registry Editor and go to:

HKEY_LOCAL_MACHINE\SOFTWARE\Microsoft\Windows\CurrentVersion\
Explorer\Desktop\NameSpace


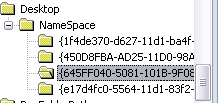
You may see some thing like this:-

After that, find this value:-

{645FF040-5081-101B-9F08-00AA002F954E}

and delete it. Done.

Go to your Desktop and refresh(F5). Your Recycle Bin icon should now be gone.

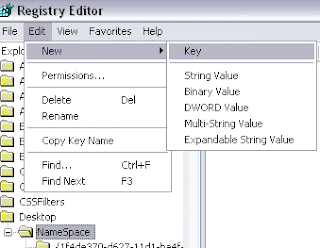
To recreate you Recycle Bin icon, simply follow this step. At the same path, select the NameSpace folder and go to Edit > New > Key

and copy/paste the value above:-

Go to your Desktop and refresh. Your Recycle Bin icon should be right there.

Ok, maybe you'd like to remove the other Desktop object. Check out this lists:-

My Computer: {20D04FE0-3AEA-1069-A2D8-08002B30309D}

Recycle Bin: {645FF040-5081-101B-9F08-00AA002F954E}

Microsoft Outlook: {00020D75-0000-0000-C000-000000000046}

Internet Explorer: {FBF23B42-E3F0-101B-8488-00AA003E56F8}

The Internet: {3DC7A020-0ACD-11CF-A9BB-00AA004AE837}

My Network Places: {208D2C60-3AEA-1069-A2D7-08002B30309D}

Briefcase: {85BBD920-42A0-1069-A2E4-08002B30309D}

Dial-Up Networking: {992CFFA0-F557-101A-88EC-00DD010CCC48}


Yeahh...that's all for today. Have fun!

Tuesday, July 24, 2007

Dafont.com - Great fonts for download

Alright. This is it. My favorite font resource, Dafont.com. This website has a lot of cool fonts. All of them are free to download. If you want to create a logo, text, banner or whatever, I'd like to recommend you this website.

For your information, I'm currently working on my brand new blogger templates. I prefer the 3 column blogger template than the 2 column one. It's really hard to modify the templates since I've no experience on CSS. I have to redesign the layout, banner, logo and all my font style.

I really hope that I can finish it by next month. Yeahhh!!!

Monday, July 23, 2007

Blogger - Customize the page title

I really don't know either it is useful or not for you guys. But for me, it's quite useful if you have a long blogger page title. As you can see, my homepage page title was look like this:-

and my post page title was like this:-

How do I do it?

Ok, take this simple steps.

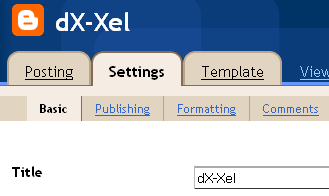
Go to your Dashboard > Settings > Basic. Make your blogger's title as simple as you can (see below).

After that, go to Template > Edit HTML

Find this code:-

<title><data:blog.pagetitle/></title>

Replace it with this code:-


<title><data:blog.pagetitle> | Blog, Computers, Internet, Technology, Design</data:blog.pagetitle>

Change the words between "|..., Design" and then save your template. Done.

Note: If you want to use the "&" symbol, make sure you type it like this, &amp;

More "& Commands" at HTML Goodies.

Saturday, July 21, 2007

Illustrator tutorial - How to use the pen tool?


Well, I don't even know if I can call this an Illustrator tutorial. It's the basic thing you should learn. For Illustrator's experts, the pen tool is the very important tool to make the tracing or drawing result to look nicely and smoothly on the artboard. For me, it's not impossible (I mean, you can do it too).

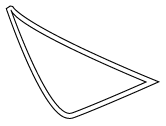
In this tutorial, we will learn on how to draw the Spider-man's eyes (See image above).

Software: Adobe Illustrator CS

Step 1

Create a new file with any Artboard Setup and make sure you select the RGB Color for Color Mode. I used 600px x 600px artboard setting in this tutorial.


Step 2

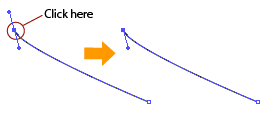
Select the Pen Tool (P) and make sure your fill color look like this . Make the first Anchor Point in your artboard. After that, make another Anchor Point at the top left from the first one. Stay at that point and don't release your left click. Drag your mouse cursor to the top a little bit to make a curve and release your left click. It would be something like this:-



Now, this is the important step. While the pen tool is still selected, click on the anchor point that we’ve just created to get rid one of the anchor point’s handler.


Why do I say that this is an important step?

Well, I don’t know how to say but if you did this every time after you’ve added a new anchor point, you’ll be able to control on how the curve will be drawing after that.

If you try to trace some photo using Illustrator, then, this is the step that you should know or you’ll be end up with an ugly shape.


Step 3

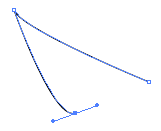
Make the third anchor point on the bottom-center of the line created before. Hold your left click and drag your mouse cursor to the first Anchor Point a little bit until you satisfied with the shape (see below).


Step 4

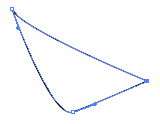
Complete the shape with clicking to the first Anchor Point (see below).


Note:-

1. At this point, I expect that you’ve know on how the pen tool works. We have to click at our very first anchor point to complete the shape except if you only want to draw a curve line.

2. The curve shape will be appear when you start dragging your second anchor point to the left-right or top-bottom.

3. By pressing the Shift key while you’re dragging the anchor point, you’ll able to draw the curve in 45 degrees, 90 degrees and so on.


Step 5

Select the shape that you have just created and go to Object > Path > Set Path. Enter this value, Offset: 5px, Joins: Miter, Miter Limit: 4. Press OK (see below).


Step 6

To make the shape angle look nicely, select the Direct Selection Tool (A) , after that select the offset path and then select the Add Anchor Point Tool (+) . Add Anchor Point to the angle and move it up-down or left-right using the arrow key at your keyboard (see below).
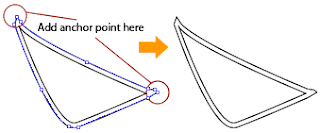


Step 7

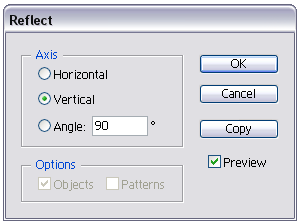
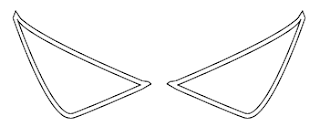
Select the whole image, copy (Ctrl + C) and paste it in front (Ctrl + F). And then right click > Transform > Reflect and select Axis: Vertical, Angle: 90. Move the duplicate image to the right and congratulation, you’ve draw the Spider-man’s eyes!


And this is the Spider-man's eyes!


Ok, go to next step to give this eye some color.

Step 8

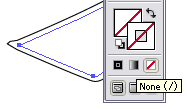
Select the eye on the right side and remove the outline stroke by clicking the None tool or press the / on your keyboard. See below:-


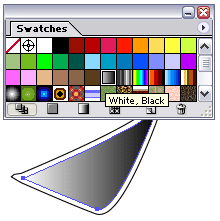
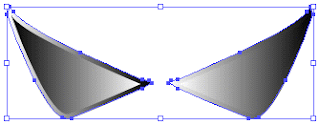
Just right after that, apply the White, Black gradient effect on it.


Note: Go to the menu bar Window > Swatches to open your Swatches palette.

Step 9

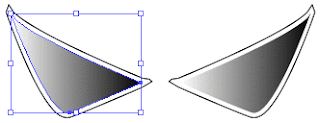
Now, press V to select the eye on the left side. Repeat Step 8 to remove the outline stroke and apply the gradient. You should have something like this:-


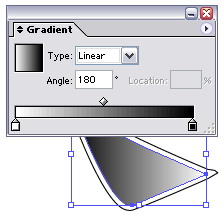
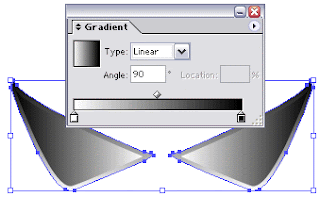
While the eye is still on selected, go to Gradient palette or press F9. Set Angle: 180 and press ENTER.


Step 10

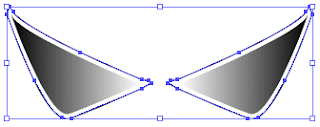
Select both of the eyes offset path. To do it, click on the left offset path and while pressing the Shift key, select the right offset path.


Then, once again, repeat Step 8 to remove the outline stroke and apply the gradient effect. You should have something like below:-


While the offset path is still on selected, go to Gradient palette or press F9. Set Angle: 90 and press ENTER.


Step 11

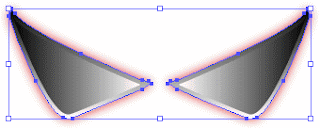
Next, we gonna apply some glow effect for the offset path. Go to Effect > Stylize > Outer Glow…You’ll see the Outer Glow window. Click the faded yellow box to change the color. Enter CC0000 in the # box.


Press ENTER and press ENTER once again. You’ll get something like below:-


Ok, it’s done for the eyes. Next, for the background.


Step 12

Select the Rectangle tool or press M and click once at the artboard. You’ll see a popup window. Enter this value. Width: 350px and Height: 175px and press ENTER.

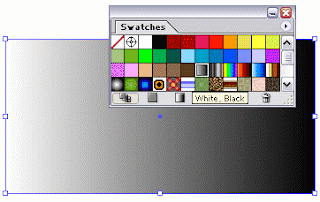
Then, apply the White, Black gradient effect on it.


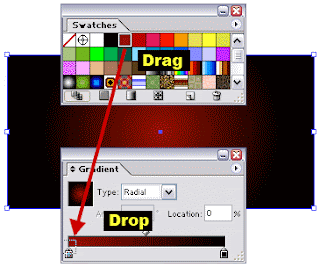
Now, go to your Gradient palette or press F9. Set the Type: Radial. Then, drag the red color from Swatches palette to the left handler of the Gradient palette. See below:-


Finally, right click on our background image > Arrange > Send to Back or just press Ctrtl+Shift+[.

Our final result:-


Yeahh..that’s all and hope you enjoy this tutorial. If you want to add the Spiderman 3 font, just download the Homoarakhan Font.

Related articles:-

 
Powered by Blogger