Click image to view a full size.
Abstract design was really great. Its created a unique experience in the eyes of designers and a different impressions among the people who saw the design. And today, we will learn on how to create the abstract colorful waves in Illustrator using the Blend technique. This is a good practice for a newbie out there as we’re using a pen tool in this tutorial.:)
Software: Adobe Illustrator CS
Step 1
Create New Document with any Artboard setup and select RGB Color for Color Mode. As for this tutorial, I used 1024px x 768px setting.
Step 2
Let’s get started by creating a simple radial gradient background. Select Rectangle Tool or just press M and click once anywhere on the artboard. You’ll see a popup window and enter Width: 1024px and Height: 768px (depends on your artboard setting) and OK.
Apply a gradient color on it by clicking this tool and remove the stroke color. Go to Gradient palette (F9), set to Type: Radial and blue (#9FBFDF or 159, 191, 223) to white gradient.
Go to Align palette (Shift+F7) , click on Horizontal Align Center and Vertical Align Center. Make sure you select Align to artboard by pressing the arrow button beside it.
You may have something like below.

Note: My artboard size was scaled to 40% as Blogger will automatically resize my image to 400px x 400px :(
Step 3
Go to Layers palette (F7) and lock Layer 1. Create New Layer.
Step 4
Grab your Pen Tool or press P and then set the stroke color to black and no fill color. Go to Stroke palette (F10) and set Weight: 30pt.
Draw two lines like below:-
Pen tool tip: After drawing the first line, press Ctrl/Cmd and click outside the line area to release the anchor point connection and then draw the next line.
Note: It was ok if you don’t draw something as above. Remember, it’s just an abstract design and for newbie, just click and drag the pen tool on the artboard (I also did it before..hehe) to make a curve. Keep practice until you master the tool.
Step 5
Select our two lines, go to Object > Expand. Just click OK if you see a message box.
Click on Direct Selection Tool or just press A. Go to the starting point of one of our line and select one anchor point right there.
Click and drag the selected anchor point over the top of next anchor point beside it and release your click.
Step 6
Repeat Step 5 to the other three starting and ending points of our line to create a sharp ending point. You should have something similar as below:-
Step 7
Press V and select both of our lines. Go to Object > Blend > Blend Options…Enter Spacing: Specified Steps and 15. OK.
Then go to Object > Blend > Make. You’ll get something similar as below:-
After that, go to Object > Expand and just press OK. Go to Object > Ungroup. Repeat this step (ungroup) until you cannot ungroup it anymore.
Step 8
Now for the important part. Apply a linear gradient color onto this shape by clicking the color on Swatches palette (Window > Swatches) and dropping it to the Gradient palette (F9) - See my gradient tutorial in case you don’t know how to do it.
You may use any four colors (or more) to apply on it. Anyhow, I used these color settings Yellow (#FEDE58 or 254, 222, 88), purple (#CD6DBB or 205, 109, 187), blue (#A9CFF1 or 169, 207, 241) and green (#A3C380 or 163, 195, 128).
To see a magic, go to Transparency palette (Shift+F10) and set to Multiply.
Woww! It looks great.
Step 9
Select all our shape and go to Object > Group. Make 2 or 3 duplicates and set Transparency Opacity 20%. Rotate or resize them using your creativity.
Step 10
Now, we’d like to create some supporting element into our shape. You might see how to create this shape on other website before.
Lock Layer 2. Create New Layer.
Grab our Pen Tool (P) one more time and draw two lines like below. Apply a red color for the first line, white color for the second one and no fill color for both of them.
Go to Object > Blend > Make. Set the Transparency Opacity: 30.

Step 11
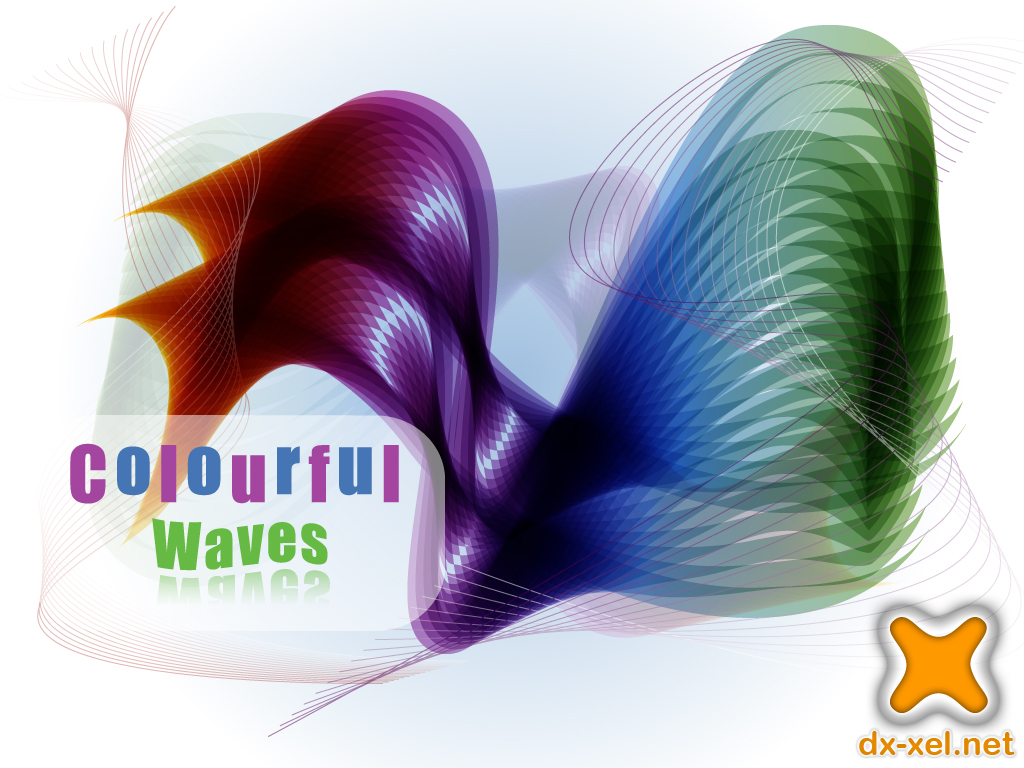
Ok, final step. Repeat Step 10 to create another one or two of our “wire wave” using different colors. Add some text, logo or anything into our design. Be creative and use your imagination.
Our final result:
Click image to view a full size.
To be honest, I also never know how the "wave" would be looks like until it comes to Step no 8. I designed the image and wrote about it at the same time. Hehe..You may explore and experiment more on this technique, combine it with other effects and come out with more stunning results than me. Coz I’m pretty sure that you guys are a creative and most experience designer!
That’s all for today..Yeahh!!!
Software: Adobe Illustrator CS
Step 1
Create New Document with any Artboard setup and select RGB Color for Color Mode. As for this tutorial, I used 1024px x 768px setting.
Step 2
Let’s get started by creating a simple radial gradient background. Select Rectangle Tool or just press M and click once anywhere on the artboard. You’ll see a popup window and enter Width: 1024px and Height: 768px (depends on your artboard setting) and OK.
Apply a gradient color on it by clicking this tool
and remove the stroke color. Go to Gradient palette (F9), set to Type: Radial and blue (#9FBFDF or 159, 191, 223) to white gradient.Go to Align palette (Shift+F7) , click on Horizontal Align Center and Vertical Align Center. Make sure you select Align to artboard by pressing the arrow button beside it.
You may have something like below.
Note: My artboard size was scaled to 40% as Blogger will automatically resize my image to 400px x 400px :(
Step 3
Go to Layers palette (F7) and lock Layer 1. Create New Layer.
Step 4
Grab your Pen Tool or press P and then set the stroke color to black and no fill color. Go to Stroke palette (F10) and set Weight: 30pt.
Draw two lines like below:-
Pen tool tip: After drawing the first line, press Ctrl/Cmd and click outside the line area to release the anchor point connection and then draw the next line.
Note: It was ok if you don’t draw something as above. Remember, it’s just an abstract design and for newbie, just click and drag the pen tool on the artboard (I also did it before..hehe) to make a curve. Keep practice until you master the tool.
Step 5
Select our two lines, go to Object > Expand. Just click OK if you see a message box.
Click on Direct Selection Tool or just press A. Go to the starting point of one of our line and select one anchor point right there.
Click and drag the selected anchor point over the top of next anchor point beside it and release your click.
Step 6
Repeat Step 5 to the other three starting and ending points of our line to create a sharp ending point. You should have something similar as below:-
Step 7
Press V and select both of our lines. Go to Object > Blend > Blend Options…Enter Spacing: Specified Steps and 15. OK.
Then go to Object > Blend > Make. You’ll get something similar as below:-
After that, go to Object > Expand and just press OK. Go to Object > Ungroup. Repeat this step (ungroup) until you cannot ungroup it anymore.
Step 8
Now for the important part. Apply a linear gradient color onto this shape by clicking the color on Swatches palette (Window > Swatches) and dropping it to the Gradient palette (F9) - See my gradient tutorial in case you don’t know how to do it.
You may use any four colors (or more) to apply on it. Anyhow, I used these color settings Yellow (#FEDE58 or 254, 222, 88), purple (#CD6DBB or 205, 109, 187), blue (#A9CFF1 or 169, 207, 241) and green (#A3C380 or 163, 195, 128).
To see a magic, go to Transparency palette (Shift+F10) and set to Multiply.
Woww! It looks great.
Step 9
Select all our shape and go to Object > Group. Make 2 or 3 duplicates and set Transparency Opacity 20%. Rotate or resize them using your creativity.
Step 10
Now, we’d like to create some supporting element into our shape. You might see how to create this shape on other website before.
Lock Layer 2. Create New Layer.
Grab our Pen Tool (P) one more time and draw two lines like below. Apply a red color for the first line, white color for the second one and no fill color for both of them.
Go to Object > Blend > Make. Set the Transparency Opacity: 30.
Step 11
Ok, final step. Repeat Step 10 to create another one or two of our “wire wave” using different colors. Add some text, logo or anything into our design. Be creative and use your imagination.
Our final result:
Click image to view a full size.
To be honest, I also never know how the "wave" would be looks like until it comes to Step no 8. I designed the image and wrote about it at the same time. Hehe..You may explore and experiment more on this technique, combine it with other effects and come out with more stunning results than me. Coz I’m pretty sure that you guys are a creative and most experience designer!
That’s all for today..Yeahh!!!


3 comments:
very nice effect
Is the blend option in illustrator version 7.0? I can't seem to find it.
Blend option is only in illustrator 9+, leave your e-mail and i will send you the link for illustrator cs3 free.
Post a Comment