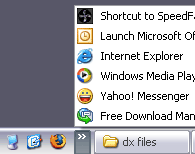
 Yea it's true, you can modify or add an item to your Quick Launch bar (image above). You can simply drag and drop the shortcut icons onto it or for some Win XP user, they prefer to open the Quick Launch folder and edit it in the normal explorer window.
Open your Run windows (Windows + R), insert %appdata%\Microsoft\Internet Explorer\Quick Launch and press ENTER.
You should be able to see the Quick Launch folder right now and you can start add, delete or modify any existing shortcut icons in it. The newly created shortcut should be reflect in the Quick Launch area in the Taskbar.
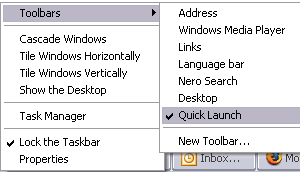
If your Quick Launch bar is not displayed, right-click an empty area on the taskbar > Toolbars and click Quick Launch.

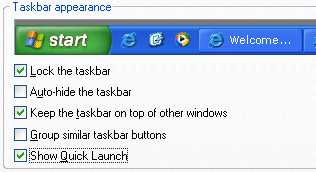
Another way to enable your Quick launch is right-click an empty area on taskbar > Properties and check the Show Quick Launch check box.
 With the one click feature, Quick Launch bar makes it easy to access frequently used programs like Firefox, Media Player, your PacMan game or anything. Besides, with one click on Show Desktop icon, you can minimizes all the programs on your desktop.
I hope this tip useful for you guys. That's all....Yeahhh!!!
Credits: WinXPTutor


No comments:
Post a Comment